Phonique — A visual AVAudioEngine Editor
I wrote a visual editor for AVAudioEngine, you can download it here: View on App Store

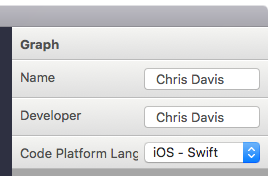
Hi, I’m Chris, A few years ago I wanted to start playing around with audio on iOS, back then, and still today you could use CoreAudio and AUGraphs to generate audio frame buffers, manipulate packets of data and basically play audio.
If you’ve ever used this API, you’ll know for it’s power, it’s complex.
All hail AVAudioEngine.
I found AVAudioEngine by chance in a StackOverflow post, it must have been announced at WWDC, but I never saw it. AVAudioEngine is a high level API for working with audio on iOS/macOS/tvOS/watchOS. It has a really great API and you can be up and running really quickly.
Much like my last post about my WarpTool, I wanted to go faster.
The need
I wanted a system where I could just drag components onto the screen, connect them together and listen to what the output was. I didn’t want to have to write code to do this. — but of course, I wanted anything I visually designed on screen to give me the code so I could use it in a real app.
The first version of the app didn’t work at all, it was just me envisioning how I wanted it to work:
The finished editor for Phonique:

Progression of design
A quick trip down memory lane of how the editors design progressed over development:
In this version I was using a multiple document based setup, where you could have multiple document windows and switch between different graphs. It didn’t work, but I didn’t feel like people would have multiple documents open at once.

So I went to a single document app, note the main design area is SpriteKit.

Further progression with code generation, and terrible code highlighting!
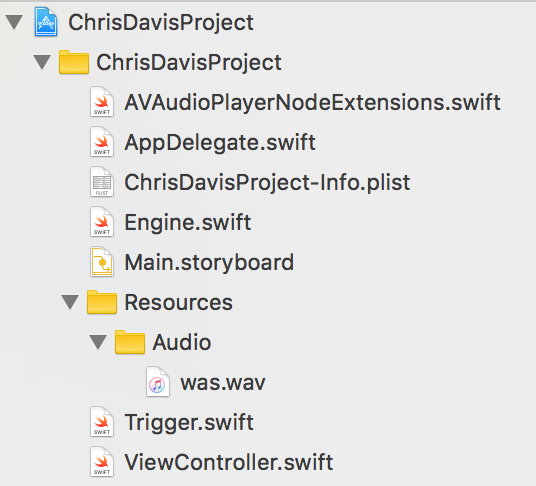
Why is this project written in Objective-C, not Swift?
I originally started to write this on Objective-C before Swift was released, I rolled with it. I just checked and there’s 180 commits for the project, but I reckon maybe 200 in reality before I moved to source control.
Plugin based architecture
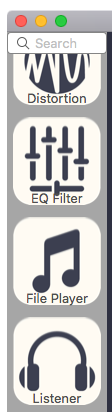
The app runs from plugins, it does nothing without them, each of the tools on the tool palette are a plugin.
Each plugin defines what it can do, how it should be drawn on screen, what code it exports etc.
The application defines a set of protocols that the plugins must implement and some optional ones, like, does it provide it’s own view.
A sample plugin structure looks like this:
Writing the application in this way allowed me to build up the tools over time. Defining the protocols also meant adding a new one was easy to do
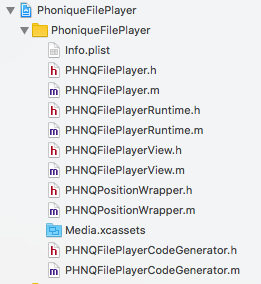
Breaking down the File Player component:
PHNQFilePlayer — This class is the main entry point/reference point of the plugin, it’s the principal class.
It contains general things like, the name of the plugin, what properties it exposes to the inspector, how it serializes itself.
PHNQFilePlayerRuntime — The runtime is what’s used by the app in play mode. It’s here where I init up the AVAudioPlayerNode and set it’s properties.
PHNQFilePlayerView — Defines how the component is displayed in the design area, where it’s inputs and outputs are.
PHNQPositionWrapper — Sometimes the property I want to set in the inspector doesn’t have a one-to-one mapping to the class. Some plugins have a wrapper class to help convert values.
PHNQFilePlayerCodegenerator — How the code should be generated.
Media.xcassets — Contains the icon to use in the tool palette.
Note: I was going to use coding by convention, where you call your plugin whatever you want, then just add a suffix of whatever the class should do, ie: Runtime, View, CodeGenerator, but after a typo and a missed validation in the middle of the project, I scrapped it just to work with defined protocols.
Saving files
Like my other tools, Once I created something, I wanted to be able to save it, and open it up again at a later date, so once again, FileWrappers come to the resuce. There’s nothing fancy here, the data is saved as JSON, a screenshot is taken for the thumbnail.
In-Display text
As I was developing the app, I found I was selecting components and flashing my eyes over to the inspector to see what was set as a blank component on the screen was use to no-one.
So I added text for each component, the text on top told me what type it was and the text underneath the component specific detail.
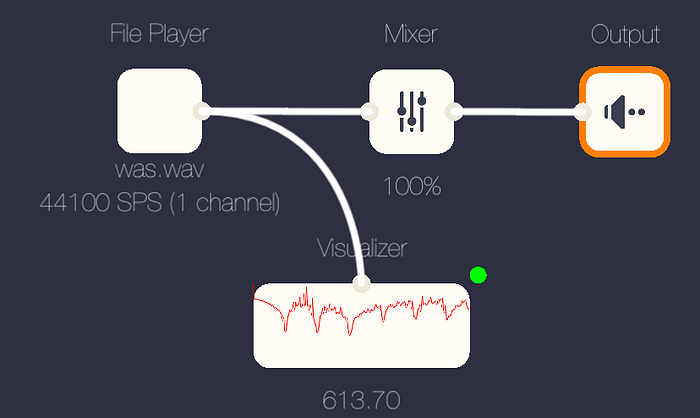
Connecting components
Components generally have one input and one output. Components like the output only has an input.
Each component decides how many inputs and outputs it can have so I wrote a connector validator that runs when you try and connect one component to another, keeping things in mind like, you cannot connect to yourself, you can’t connect an input into another input etc.
Component Types
Wave Generator
The wave generator can generate 4 different types of waves, Sine, Square, Triangle & Sawtooth.
3D Sound
This one is so cool to play with, to test it out, you’ll need a 1-channel audio file and some headphones. You can move the audio file in 3d space, and the output will pan across your headphones, it’s wonderful. 3D Sound requires a 3D Environment in the pipeline for it to work.
Pitch shifting/ Distortions
Shifting the pitch of your voice, like when you inhale helium is such an easy task to perform with AVAudioEngine. Have a listen here:
FFT — (Fast Fourier Transform)
Sometimes when you’re running your graph, you might not hear anything, is it playing? Are my headphones turned off? Is this file playing? The visualizer component can come to your rescue, it’s an AVAudioEngine Tap. You can connect it to the output of most nodes. Then when you press play you can see an analysis of the audio coming out of that component. Super cool.
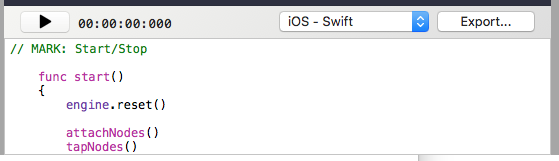
Code generation
All of the components make up a graph, I can generate a code file with all of the set properties. I wanted to generate the code as it was the main goal of the app, visually design something, and then easily get the code out.
Code exporting
This is where I went a little overboard, but why not :-D If you press the Export button, I create a complete working Xcode project from scratch, that includes the source code, resources, audio files, and the *.xcproj file (That’s probably a topic for another blog post).
You can run the project straight away (after it compiles). I create all the triggers as UIButtons so you can tappiddy tap tap away.
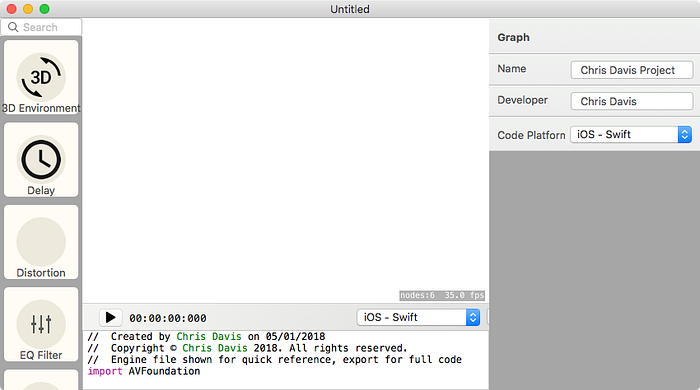
App layout
The main storyboard for the app is really simple, the left hand side is the tool palette, the middle a splitview with the top being the design area, the bottom the generator, and the right side the inspector. After doing a few more of these, I should really split out the middle into a separate storyboard, it just makes it easier.
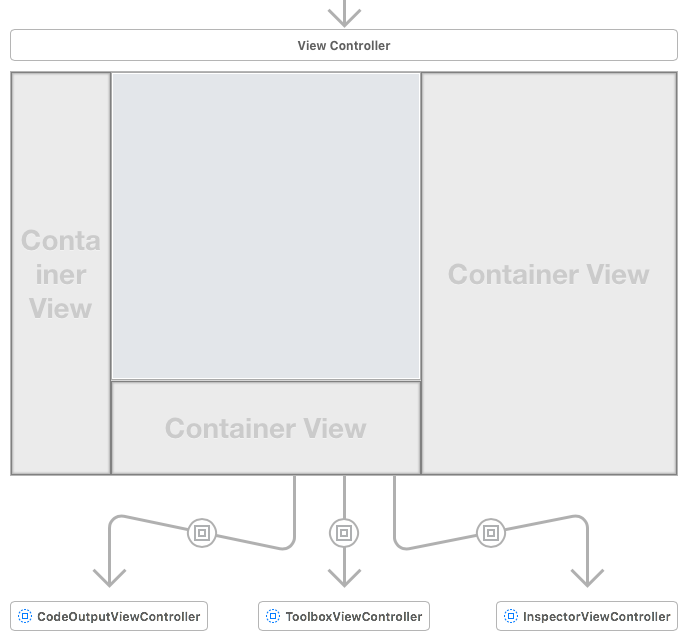
Tool palette
The palette lists all of the plugins that you have, it has a search field so that you can filter the list, it’s just a collection view.
Inspector
The inspector, as always is context-sensitive, but I tried to make this inspector a bit more visually appealing, for instance, adding a gradient to the background of each cell, having text fields with indents.
Non-standard component extensions
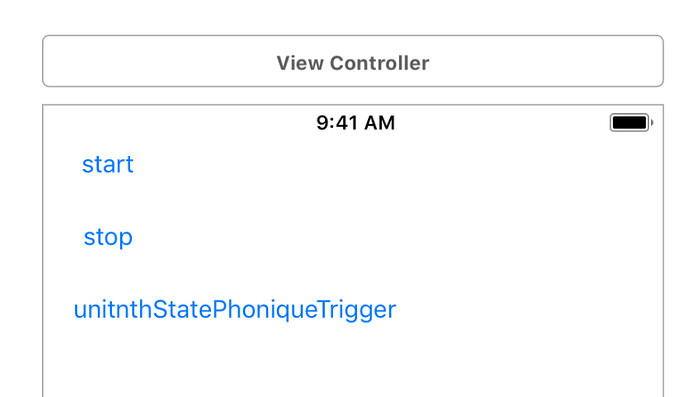
Triggers/Buttons
I wanted to also have the ability to trigger events when my graph is running, that meant adding the concept of a button that could change the parameter of a component on the fly.
Triggers can have two different modes: Toggle or non-toggle, this is so I can press a trigger and it stay on until I press it again. Or I can have activation when I press until I release.

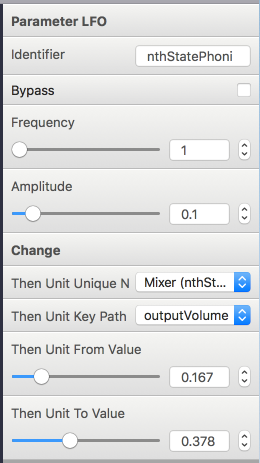
Parameter LFO’s (Low frequency oscillators)
I only wanted to add this component because I thought it would be cool. The parameter LFO cycles in a sinusoid fashion. The value at any point in time is then mapped onto a parameter of a selected component to be linerarly interpolated between a from and to value.
Listeners
This is probably the most complicated component I added. You can think of them as if this then that .
Listeners don’t directly connect to components on the design window (Although I probably should show some indication of the component they connect to).
For each listener, you can specify what other component’s parameter on screen you want to listen to, once selected, the listenable properties of that object are displayed. Here’s an example:
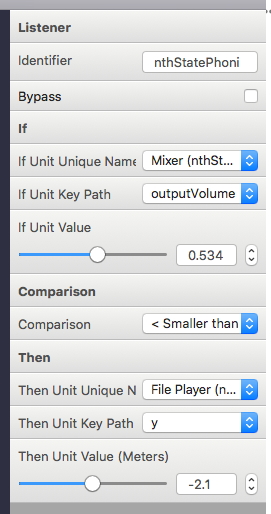
This listener says:
If the mixers output volume is smaller than 0.534
Then
The file players Y position should be set to -2.1 meters
You can imagine how much havoc you can cause :-) You can have as many listeners as you like. Here’s a video of it in action
Overview
You can download Phonique from the mac app store here: View on App Store I’m happy with this app, sometimes, even if I don’t have an audio project in mind, I open it up, just to play and create wonderful things, it’s almost like a playground for audio ideas.
You can find me on twitter or on my personal site here: www.chrisdavis.com